Category Archives: Flash Audio Tutorials

Flash Audio: Creating Stereo Sound

Welcome back to our series about Flash Audio. Now we will deal with some more complicated stuff, stereo and mono sounds. To accomplish that, I have to instroduce you to the Transform object in Flash. Sounds complicated, but it’s not that complicated. In ActionScript, you have the “Object” DataType. Like this:

//define an object in ActionScript
var myObject:Object = new Object();

//add properties
myObject.name = “SomeBody”;
myObject.surname = “SomeSurname”;

Now you have an object with the properties name and surname.

But what has this to to with the sound? Here is the answer. The sound in Flash is transformed eg. divided into speakers. When the stereo sound is on (by default it is stereo), then the right speaker has the percentage of 100 and the left too. In ActionScript, it is written like this:

ll = 100
lr = 0
rr = 100
rl = 0

What the heck? It’s not that complicated. Ll stands for Left input on left speaker. Lr stands for left input on right speaker. Rr for right input on right speaker and rl for right input on left speaker. The variables can have values from 0 – 100. As you suggest, you adjust the values to create mono or stereo sound.

//sample mono on left speaker
ll = 100
lr = 100
rr = 0
rl = 0

//sample mono on right speaker
ll = 0
lr = 0
rr = 100
rl = 100

So now that you understand the show transform object you have to know how to apply this to the sound object. Assume you have a track in your Flash document library with the linkage ID set to “myTrack”. The code would look similar to this:

//create the new sound object
var mySound:Sound = new Sound();

//attach the track from the library
mySound.attachAudio(“myTrack”);

//create the mono sound transform object for the right speaker
var monoSoundRight:Object = new Object();
monoSoundRight.ll = 0
monoSoundRight.lr = 0
monoSoundRight.rr = 100
monoSoundRight.rl = 100

//apply it to the sound object
mySound.setTransform(monoSoundRight);

So, it is now very easy to create a Flash movie with buttons that switch between left and right speakers. Here is how it is done:

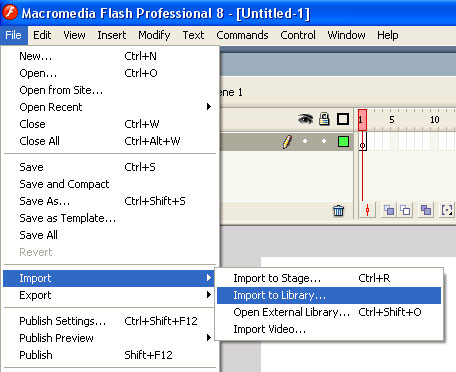
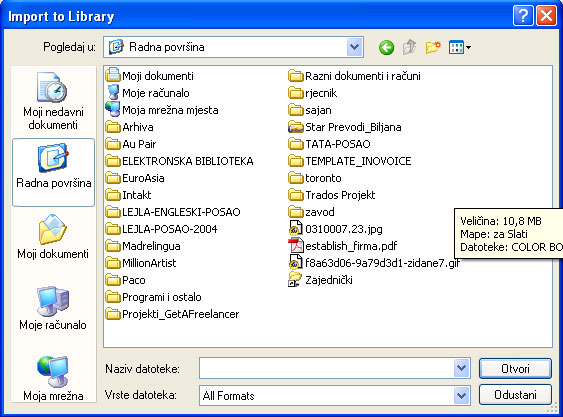
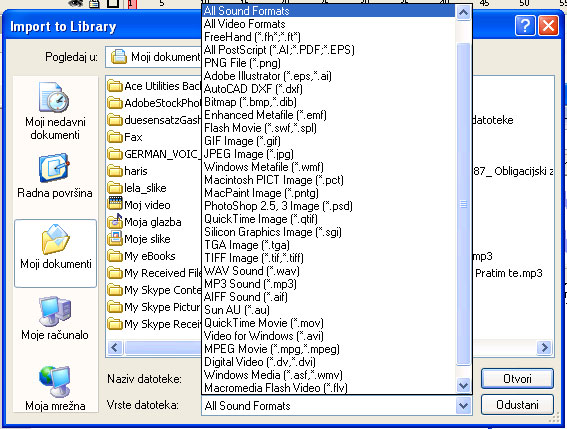
Open a new Flash document. Import a new sound into the library (Image 1).

Stereo audio in Flash

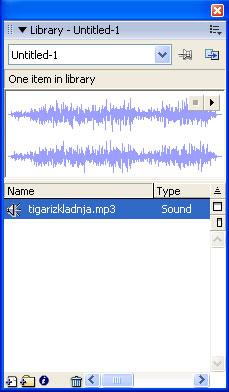
Give it the linkage ID “myTrack” (Image 2).

flash stero audio tutorial

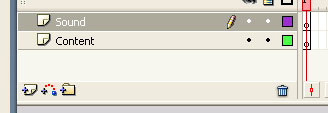
Create two layers on the main timeline: “Actions” and “Content”. Make sure the “Actions” layer is above the “Content” layer (Image 3).

stero audio in flash

Create two buttons for the right and the left speaker. Place them on the stage and give the left button the instance name “left_btn” and “right_btn” to the right button (image 4).

flash audio tutorial

Paste the following code into the first frame of the Actions folder:

var mySound:Sound = new Sound();
mySound.attachSound(“myTrack”);

mySound.start(0, 50);

right_btn.onRelease = function () {
mySound.setTransform(rightMonoSound);
}

left_btn.onRelease = function () {
mySound.setTransform(leftMonoSound);
}

var leftMonoSound:Object = new Object();
leftMonoSound.ll = 100;
leftMonoSound.lr = 100;
leftMonoSound.rr = 0;
leftMonoSound.rl = 0;

var rightMonoSound:Object = new Object();
rightMonoSound.ll = 0;
rightMonoSound.lr = 0;
rightMonoSound.rr = 100;
rightMonoSound.rl = 100;

var stereoSound:Object = new Object();
rightMonoSound.ll = 100;
rightMonoSound.lr = 0;
rightMonoSound.rr = 100;
rightMonoSound.rl = 0;

Flash Audio: Import/Add Sound To A Movie

The first thing you have to do of course is to start Flash. In this tutorial I use Flash 8 Professional, but the tutorial here can be applied to Flash MX 2004 or Flash MX. Go to File -> Import -> Import to Library….

How to add audio to Flash project

A dialog box appears asking you to choose a file from your hard drive.

Add audio to your flash project

Because you need only sound formats and the rest can be ignored, the next thing you have to do is to filter the sound files using the “Files of Type” drop down menu and selecting “All Sound Formats”.

Add music and sound effects to your multimedia flash project

add wav file to flash audio project

Select an MP3 (or other sound format) on and click “Open”.

The track appears now in the Library of the Flash Movie. You can open the library through Window -> Library. Open the library to see the imported MP3 file.

add mp3 audio file to flash

As you can see, you can preview the file in the library and perform some optimization in the settings. But that’s not the focus of this tutorial, we just want to add some sound to our movie. Go to the timeline of the movie and add an additional layer (Insert -> Timeline -> Layer).

sound layer, content layer in flash audio tutorial

Now you have 2 layers on your timeline. Rename the upper layer “Sound”, the layer below rename to “Content”. That’s it. Your timeline should now look like on image 7.

timeeline for audio in flash tutorial

Select the first frame on the layer “Sound” and open the first properties panel (Window -> Properties). In the panel, find the “Sound” drop down panel and select the imported sound file.

sound drop menu in flash tutorial

You can now test the movie clicking on Control -> Test Movie or pressing Ctrl + Enter.

Embedding Audio Files

How do I put background music on my web page?

It’s fairly simple to add background music to your web page but first you have to consider your visitors. Never put a sound that plays automatically in the background with no option for the user to turn it off. In fact, it would probably be best to give your visitors the choice of turning on the music only if they want to hear it.

 The <EMBED> tag is the most common way of adding sound to a Web page. Its advantage over the <BGSOUND> tag is that it is supported by both browsers, and more consistently across the PC and Mac platforms. The <EMBED> tag introduces many features that aren’t supported by <BGSOUND>. Furthermore, while the <BGSOUND> tag only supports background sounds, the <EMBED> tag also features an interactive interface (including various buttons to play, stop, and handle the sound). Let’s take a look at the <EMBED> tag in action
(requires a sound-enabled browser)

The HTML code that generates a control panel is very simple:

This code:
<EMBED height="20" SRC="http://www.partnersinrhyme.com/indexmidis/BLUES.MID" VOLUME="50" loop="true" controls="console" AUTOSTART="FALSE" width="128">

Will produce this console:

This version uses a WAV file instead of a midi:
<EMBED height="20" SRC="http://www.sound-effect.com/sounds/loops2/SweetDreams.WAV" VOLUME="50" loop="true" controls="console" AUTOSTART="FALSE" width="128">

If you find a sound you like somewhere on the web and decide you want to use it on your web page make sure you download the file to your hard drive then upload it to your own server. Do not under any circumstances link directly to the server you found the file on. Hot linking to someone else’s server is considered bandwidth theft and is against the law.

The attribute, "autostart=true," specifies whether the file should start playing automatically after it loads. If autostart is set to "false," then the file will load into the sound player utility but the user will have to click on the "play" button of the sound player utility in order to start the playing of the sound file.

The LOOP attribute tells the browser how many times you want the the sound to repeat. If you added LOOP="10" to the <BGSOUND> tag, the sound would play 10 times and then stop LOOP="TRUE" will play the loop until the user stops it.

If you need more music loops you can always download free royalty-free music loops here.


If you find a sound you like somewhere on the web and decide you want to use it on your web page make sure you download the file to your hard drive then upload it to your own server. Do not under any circumstances link directly to the server you found the file on. Hot linking to someone else’s server is considered bandwidth theft and is against the law.

The attribute, “autostart=true,” specifies whether the file should start playing automatically after it loads. If autostart is set to “false,” then the file will load into the sound player utility but the user will have to click on the “play” button of the sound player utility in order to start the playing of the sound file.

The LOOP attribute tells the browser how many times you want the the sound to repeat. If you added LOOP=”10″ to the tag, the sound would play 10 times and then stop LOOP=”TRUE” will play the loop until the user stops it.

If you need more music loops you can always download free royalty-free music loops here.